Here's how to turn it on in Windows 7 and above.
- Go to Network and Internet, then Network and Sharing Center in Control Panel. Click Change adapter settings on the left panel.
- Click on the active network you wish to share. A dialog box showing network status will pop up.
- Click Properties, then select Sharing tab.
- Check Allow other network users to connect through this computer's Internet connection, as shown below.
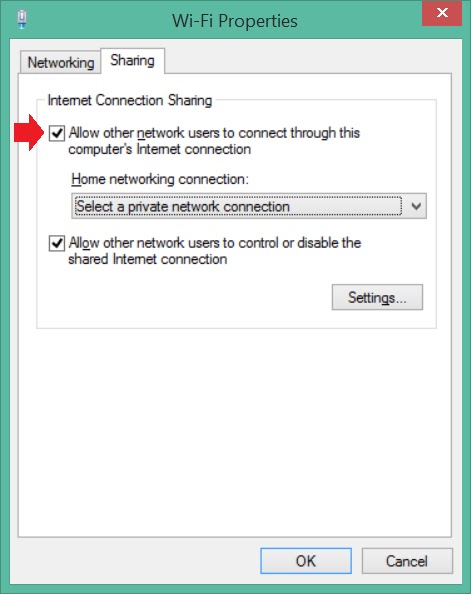
- For Home networking connection, select the name of the network connection between the laptop and Raspberry Pi.
Source:
How to share Wi-Fi in Windows 8 with Internet connection sharing (ICS)

0 persons flung their shoes:
Post a Comment